Ditching Bell’s Gigahub 2.0 Router and Using Your Own
For enthusiasts everywhere, the prospect of fighting an ISP’s choice of modem and router is daunting. In the case of Bell Canada, they’ve used routers that have been dubbed Gigahub and Gigahub 2.0. In the first version of the router, there was no “bridge”1 mode available, but if you place a router behind it, you can log in with your PPOE2 account and enjoy direct access at full speed. Enter the 2.0 edition of Gigahub and that process found your connection throttled to 1gbs or less both ways. If you search enough, you’ll find a hardware bypass connecting the fibre line directly into an SFP adapter you buy.
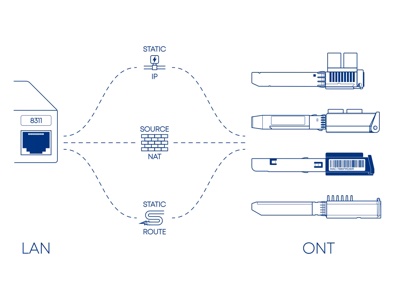
There are a ton of benefits to having your own router on the edge. One of the core of these is having better control over port forwarding, but it also let’s you introduce things like a robust intrusion protection system. When you self-host something, it’s an imperative to make it as secure as it can be. Bell was not going to give that to you and probably wouldn’t want you to self host anyway. This is somewhat clouded by the possibility that carrier-grade NAT comes into the picture and breaks the end-to-end-principle. Will Bell go there? It’s hard to know.
But, the first I heard of this was a blog article that described how to go about using a specially made SFP3 adapter in a router (in my case, the Unifi Cloud Gateway Fibre) to connect directly to Bell’s network. This would require this somewhat pricey SFP adapter, a device that would let me address it directly (the Cloud Gateway Fibre would not), and of course a router to sit at the edge. Once done, the Gigahub becomes a paperweight.
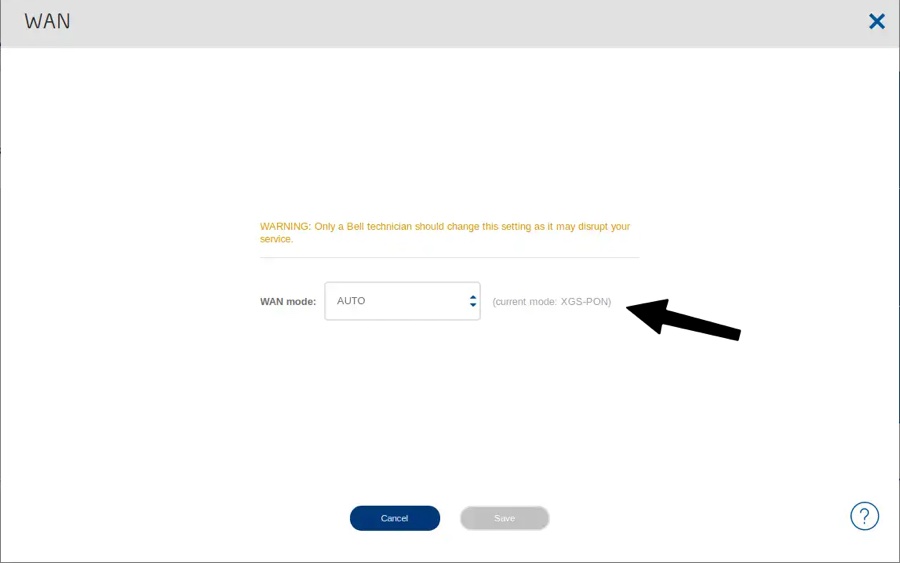
1. The first step was to log into your Gigahub’s web interface and go to the wan page. https://192.168.2.1/?c=advancedtools/wan – or replace the IP with your own Gigahubs’s IP Address. Make sure the current mode listed there is XGS-PON.
2. With that, order the XGSPON SFP from Aliexpress or other vendors listed on the PON Wiki. It took a little while to get to me, and that was fine since I’d wanted to let the Gigahub stay in service for at least a couple weeks so bell’s installation ticket closed cleanly4. Since this SFP gets a bit hot, getting the model that includes a fan is nice to have.
3. When the SFP arrived, you face the dilemma of addressing it directly. This device, once plugged into a network router or switch, attempts to create a virtual in-in band interface. For a device like the Unifi Could Gateway, your out of luck, but that cannot be done. Some have used Mikrotik’s routers, and a Unifi 16 port switch would work, specifically the US XG 16 and likely others that support SFP. Insert the SFP and it will attempt to take the IP 192.168.11.15. For this device you ssh to it – ssh root@192.168.11.1 – and use the user name root and the password is empty. Once you’re in, you have run some commands.
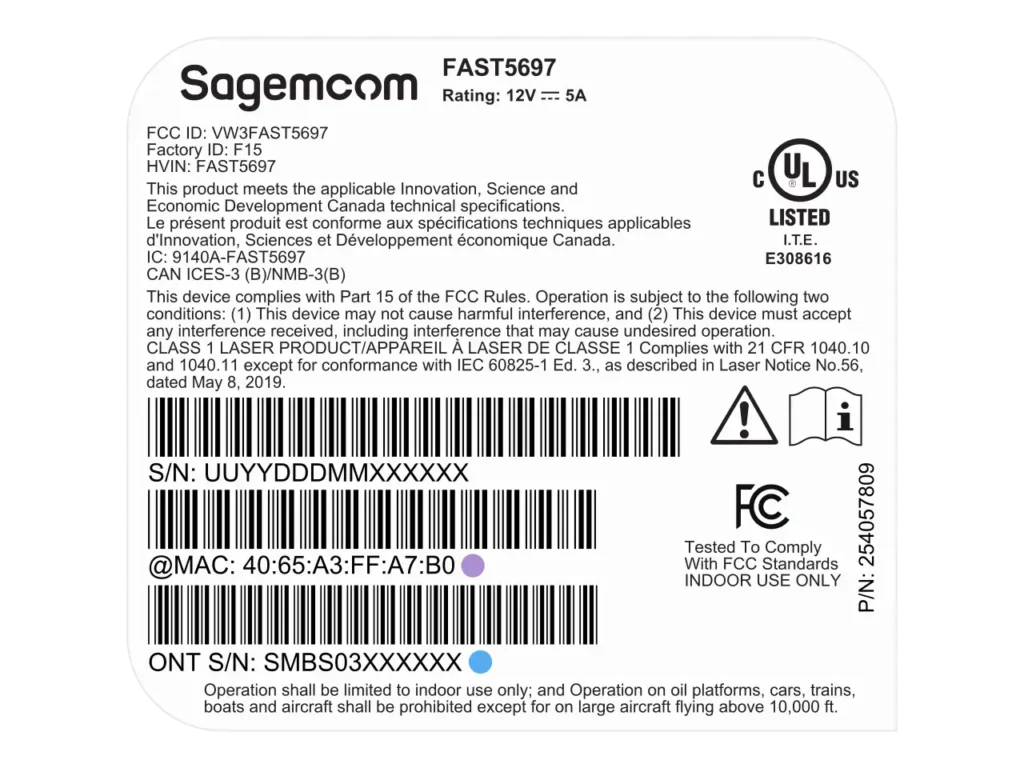
4. Next, you’ll need to gather some details. These can be found on the back sticker of your Gigahub next to ONT S/N. You’ll also need the MAC address of the router, also on that sticker. The MAC address in the fwenv_set -8 iphost_mac command (purple dot in the image below) and the ONT S/N is used in the fwenv_set -8 gpon_sn command (blue dot in image below). All the rest of these commands are static.
5. Still SSH’d into the SFP, the commands you run are as follows (replacing the values in the second and third lines with your own gathered details):
fwenv_set mib_file
fwenv_set -8 iphost_mac 40:65:A3:FF:00:00
fwenv_set -8 gpon_sn SMBS00000000
fwenv_set -8 equipment_id 5697
fwenv_set -8 hw_ver Fast5697Bell
fwenv_set -8 cp_hw_ver_sync 1
fwenv_set -8 sw_verA SGM831000156
fwenv_set -8 sw_verB SGM83100011E
fwenv_set -8 mib_file /etc/mibs/prx300_1V_bell.ini
fwenv_set -8 fix_vlans 1
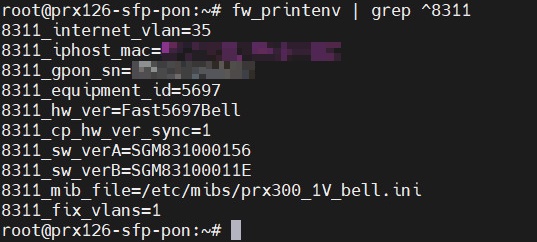
If you do an info command – fw_printenv | grep ^8311 – it might look like this:
Issue the reboot command and let the SFP reboot at least once before continuing.
6. Now, take this SFP, plug it into your router’s WAN interface. Carefully disconnect the fibre line from the Gigahub 2.0 and insert it into your ONT SFTP. Load your router’s administration interface and be sure to set the WAN to log in via PPOE with your Bell b1.. username and password. If you don’t know this password, it can be reset or rewritten on the MyBell site.
That’s essentially it. Watch the WAN interface come up and get a public IP if all is good. You can then put the Gigahub aside and enjoy having full speed access to the Internet directly. I should point out strongly that this is not supported by Bell and not something you’ll do in a production environment. If you call Bell with issues, there is zero chance they’ll help you. Always keep the Gighub close at hand in case you need to roll it back.
- Sometimes called “purple mode,” bridging was a method of bypassing the modem. ↩︎
- Point-to-Point Protocol over Ethernet, it’s a login and password that all Bell customers have. ↩︎
- Small Form-factor Pluggable, this is a networking device that allows you to connect directly to the fibre optic line. ↩︎
- This, of course, doesn’t apply if your Internet is not a new install. ↩︎
- Ideally, you’re doing this independent of your own network in order to avoid IP conflicts and set your own device to 192.168.11.x ↩︎