Re-installing an un-bootable Mac when all you have is Windows
I’ll just cut to the chase: You need a Mac. Or, more specifically OS X running in a virtual machine on a Windows computer. You could do this faster on another Mac (but I know you don’t have one of those). Every other step you’re going to take will lead you to failure. But, I can off you hope that it is possible and you can get your Mac running again. Read on.
The process of reinstalling OS X on a Mac when you have only Windows computers around (and no recovery partition) is very specific, yes, but it’s happened to me a few times. I think this happens most often when we try to re-use a Mac and follow the steps (which include erasing the drive). But, those steps also kill your recovery options too.
So, just to illustrate. Here’s a look at recovery options, what failed at every turn and what finally got me there.
First, they say to boot into Internet Recovery.
I did that by holding down Command + Option + R which is great, the spinning globe started. But I was left with an error 21:00F. This process seems more like a hail Mary and no matter what kind of connection I provided (direct Ethernet, WiFI) it failed. I would not expect this to work for you either, but, without the recovery partition, every boot-up ends up at this failing process. That’s when you know you’re in trouble.
Then there’s the process of preparing a USB key on Windows. First I needed to find something big enough. 16GB or more. Great, a Kingston DT50. During that process, the drive went read-only and never returned. Dead. Garbage.
With another key, I used the commonly described process with TransMac. The process involves first formatting the key for Mac and then dump an image of OS X to the key. The trouble with this is TransMac doesn’t make sure the partitioning is GPT (which is required), so you’re bound to the partition inside the installer DMG. 90% of my tries were not GPT, so they wouldn’t boot. Even worse, every time you try, it takes 30 minutes or more. It’s soul-crushing. You’re told that you can just use DISKPART in Windows to set up GPT, but that wipes the drive and you’re back to square one!
After some trial and error, I found an image with the file name “macOS High Sierra 10.13.dmg” on mega.nz. This seemed to be the best option so I downloaded it and used TransMac again. Great, I can boot from it.
Not so fast! The installer booted, but when you run the process, there’s an error “This copy of the Install [version] application is damaged, and can’t be used to install macOS/OSX.” Well, so it goes, Apple doesn’t explain it, but what they’ve been doing is using certificates; and these certificates expire. So, while I’m using a 2017 installer on a machine in 2020, I’ll get that error saying the setup is “corrupted” – but it’s just the certificate.
So I think I’ll just change the date. For High Sierra, it’s reasonable to target a date somewhere in 2018. Going to the Terminal from the setup screen and issuing something like “date 1116211618” (this sets the date to Nov 16, 2018. Go and re-run setup and voila, setup runs.
Not so fast! Apple must have thought of this, so with this old date and installer, you won’t be able to see or access the Mac’s local drive. So, you could now pull out the drive and do a full wipe or empty the current drive, but on some machines, that’s not even an option. Back to square one. If you’re any reasonable person, you’ve already wasted a day – if, of course, you haven’t thrown your Mac out the window.
So, finally to the process that works. Essentially you’ll need to download an image of OS X (El Capitan in this case) and run it VMWare Player. You can get the Operating System image from Google Drive and this article explains more. This is by no means the only way to get OS X working in Vmware, but it is likely the quickest way. With Vmware, you’ll also need the auto-unlocker to make sure OS X boots.
With OS booted in VMware, make sure you have a network card and it can connect to the Internet. Then, go to the macOS version you want to target on the unbootable.
MacOS Mojave – App Store Link
MacOS El Capitan – Direct Link
MacOS Yosemite – Direct Link
MacOS Sierra – Direct Link
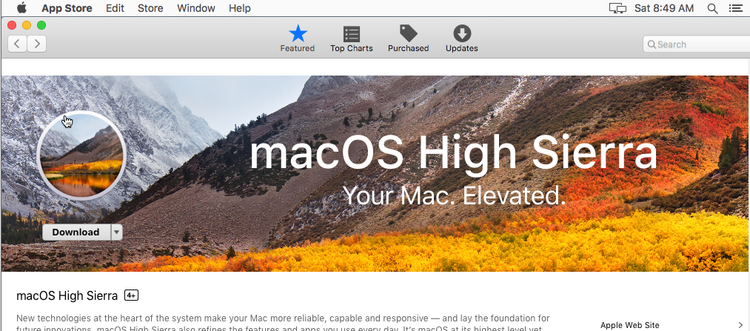
MacOS High Sierra – App Store Link
MacOS Catalina – App Store Link
In each of the above cases, you want to either download and extract the file (from the direct link) or download it from the App Store directly. To be consistent, extract the MacOS installer app to the /Application directory. Below is what I ended up with after using the High Sierra App Store link.

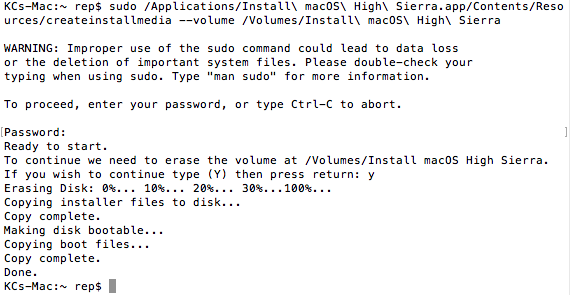
Now, plug in your USB Key, make sure that it’s connected to the VMWare host and MacOS can see it (open Disk Utility to investigate). If all is good, run Terminal and execute the command to create a boot disk.
My case was (notice that spaces are handled by using “\ “):
sudo /Applications/Install\ macOS\ High\ Sierra.app/Contents/Resources/createinstallmedia --volume /Volumes/MyVolume
Using Disk Utility I found the name of the volume on my USB Key – it was /Volumes/Install macOS High Sierra (you might need to format it), and using that I built a command and did the following to format and make bootable my USB key with the newest version of macOS:
You can get all the command lines for different versions of macOS here.
With this USB Key, I went back to the dead Mac, held the Option key on boot and the computer saw my USB Key, booted, saw the local drive, let me erase it (again) and then finally install to it. This whole thing can easily kill a day of your life, but don’t be that person. Do what works and get this thing done.